


Resumes 101
The only resume guide a college student will ever need

Let’s imagine you walk into a magical library and inside are 8 billion books.
This library is so massive that you’ll never see or read every book in there. Fortunately for you, you’re not looking for any random book.
You like science fiction, so you put out a request for science fiction books.
The librarian of this magic library goes out, picks out some science fiction books they think you’ll like, and leaves them on a table for you at the front.
You pick some up. You skim a few pages. You read the back of some covers.
Finally, you find one you like, check it out, and head home.
This is exactly the way applying for a job works. Just like you walk into the library looking for a book, an employer is looking for someone to hire. Just like you ask the librarian for science fiction recommendations, the employer puts out a job listing for candidates to apply to.
And just like you skimming books and reading back covers to pick out your favorite one, so too does the employer look at resumes to pick which candidate to hire.
That’s what makes a resume so important — it’s the first thing someone looks at when they are considering hiring you, so its quality often directly determines whether or not you get an interview. A poor candidate with a great resume may get an interview, but a great candidate with a poor resume will unfortunately receive only “We’re sorry to inform you…” emails.
In essence, a resume is a one-page document that summarizes your work experience, education, skills, and accomplishments. In this guide, you’ll learn how to make your resume great.
A few things before we get started:
Making a great resume will take much longer than you think. Writing the bullet points for your experiences is difficult, but it gets easier with practice (as with everything). Taking the time to make your resume great is one of the best investments you can make in your professional life
Don’t feel overwhelmed when you see a great resume. I remember seeing upperclassmen resumes when I was a first year at UCLA, and it intimidated me to see so many professional experiences on a resume when I had only two. Focus on making a good resume and applying to a lot of roles, and those experiences will come. Trust me on this one!
The process of creating and editing your resume is a continuous one — there have been too many iterations of my resume to count
For this guide, I recommend you have your resume out in front of you, ready to go, so that you can make edits and changes as needed in real-time while reading through this guide. Feel free to just skim this guide as well and come back later.
If you don’t already have a resume or wish to fully re-format your current one, I recommend you use my free template here. Download it to your Google account or computer, and follow along for the rest of the article. In the template resume, the red sections are from my resume (serving as guides for you to see what a filled resume section looks like) and the bracketed phrases indicate where you fill in your relevant information.
You can also see my full resume in Word format here (up-to-date as of August 2024).
Alright, let’s get started!
Here is my resume. Looking at it, you notice some important things right off the bat:
You know right away that this is my resume and how to contact me
It’s exactly one page and fills up that one page as much as possible
The formatting is consistent throughout, and it’s easy to visually navigate between the sections
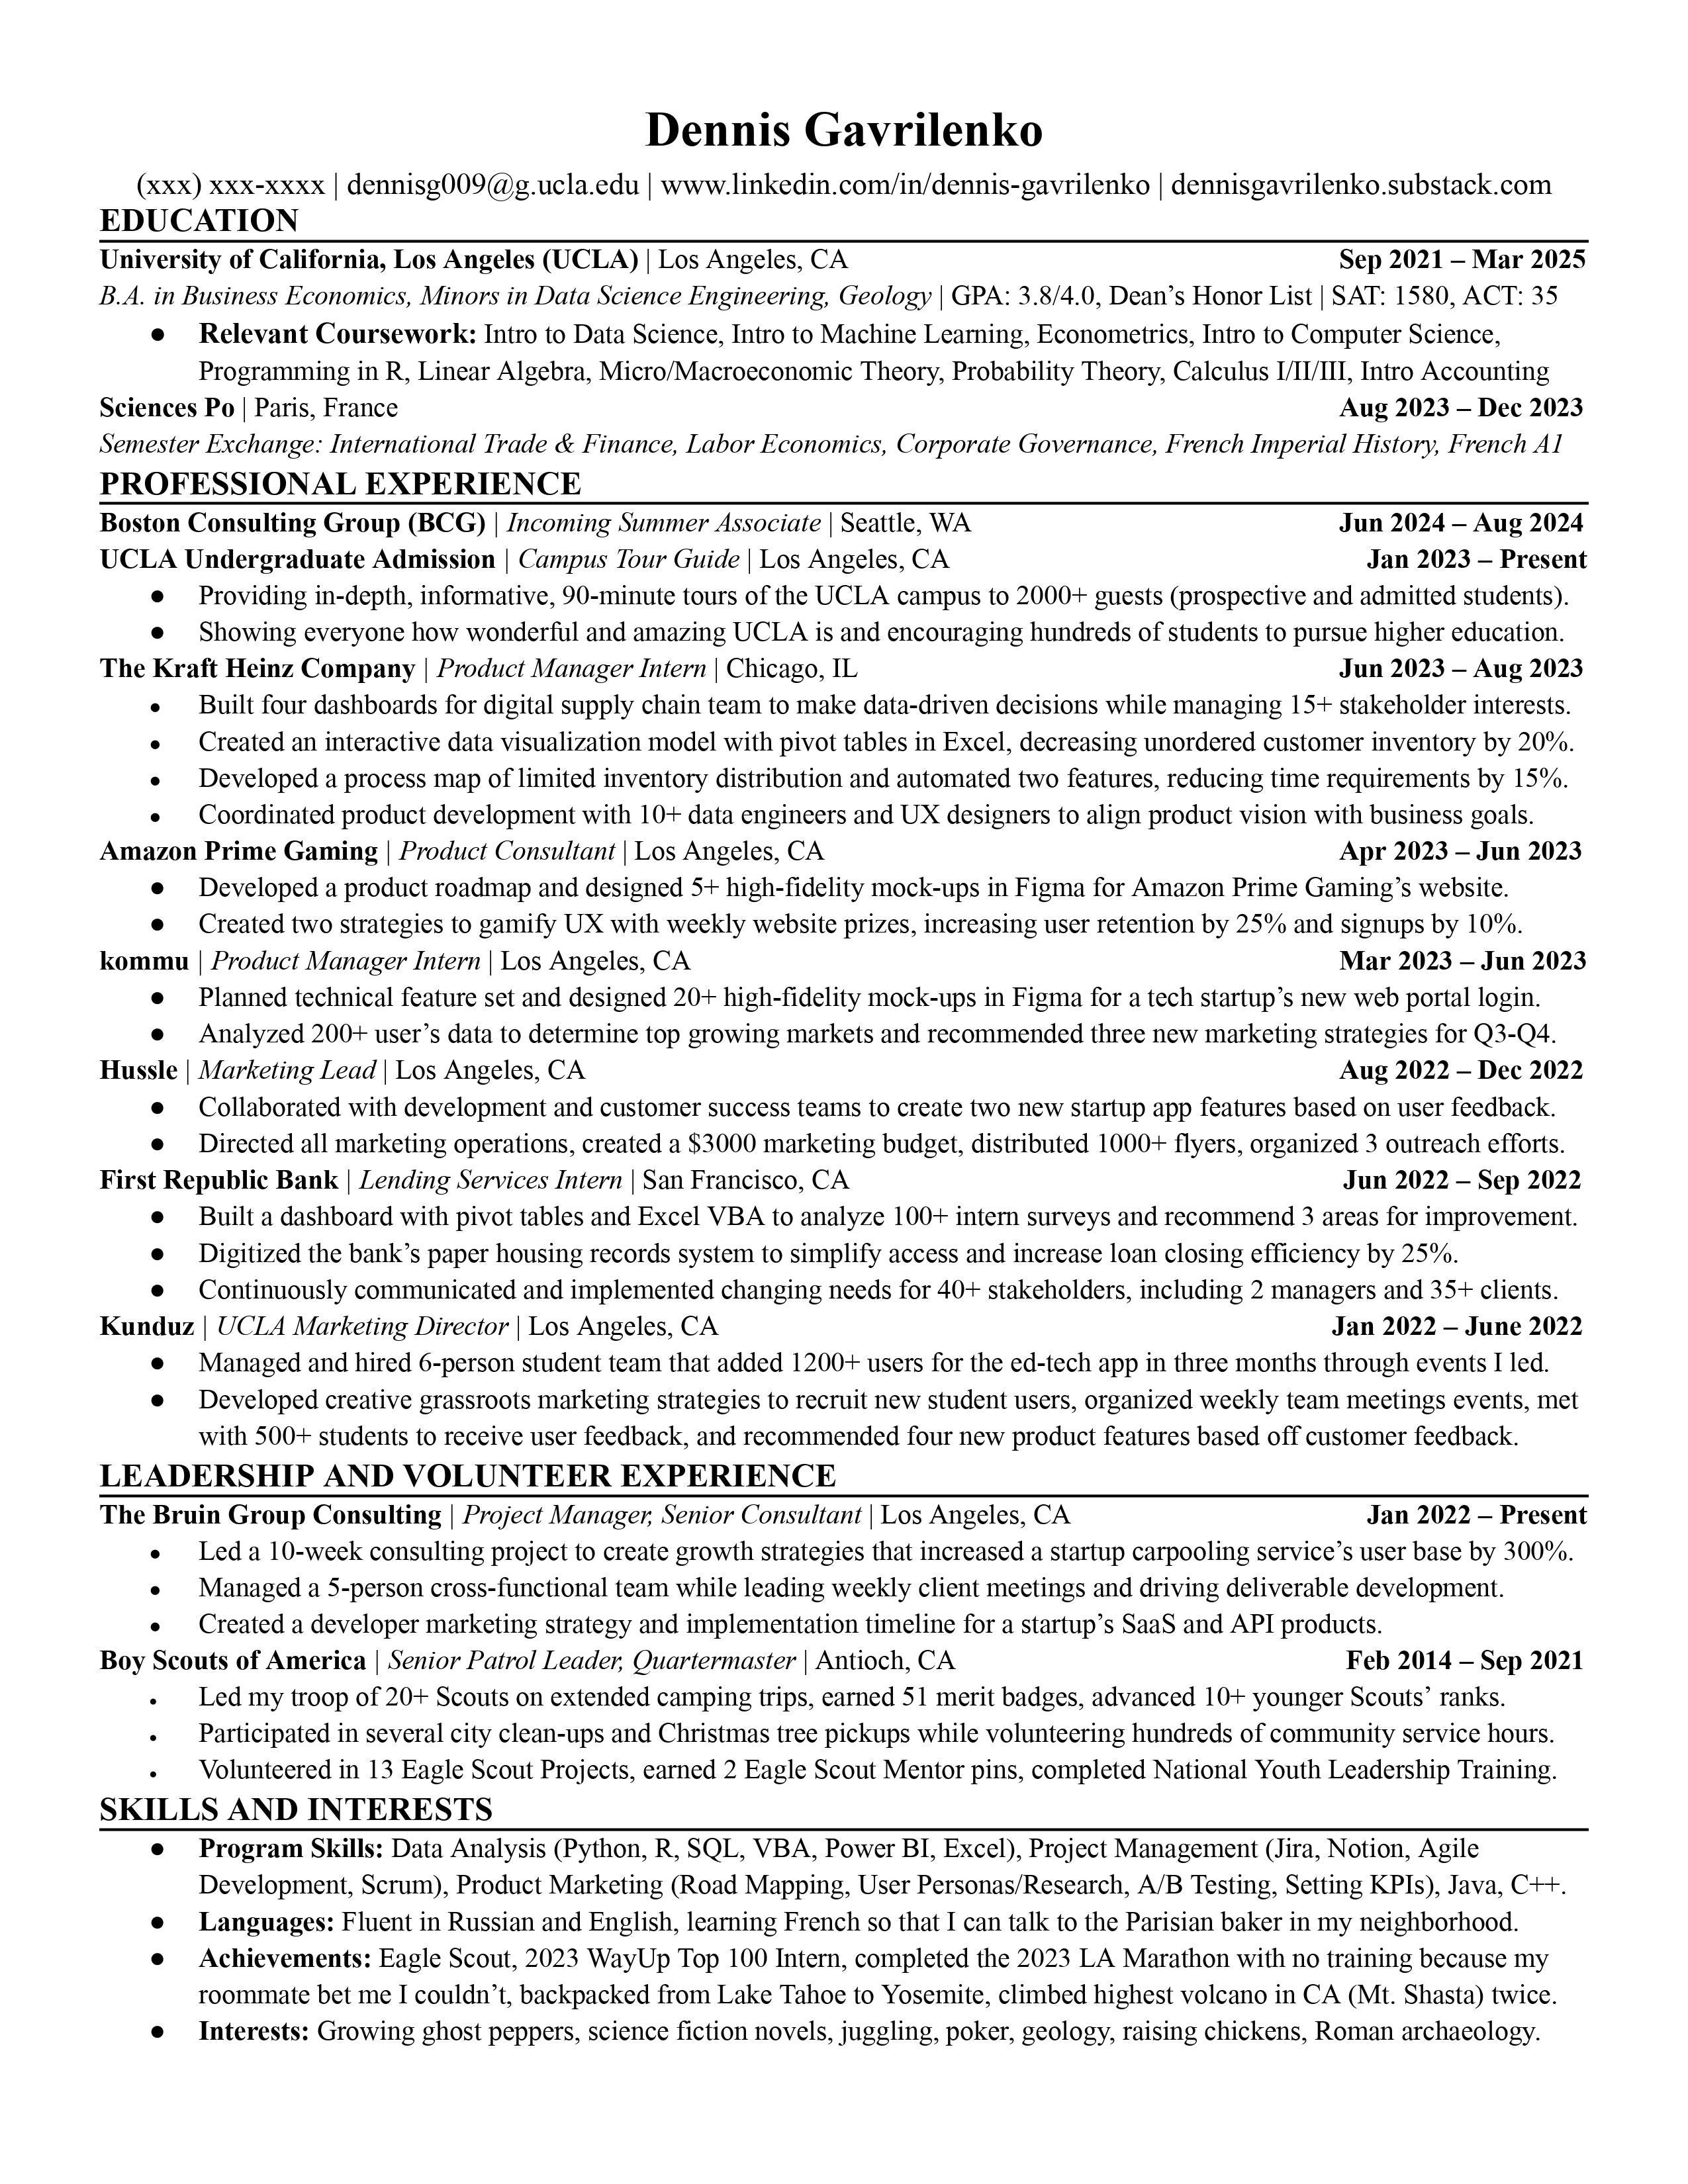
Every great resume shares these three things, and it is crucial that yours does, too.
We’ll start with the formatting, then work our way down, section by section, from the top to the bottom. Here’s the Table of Contents:
Formatting
Header
Education
Professional Experience
Leadership & Volunteer Experience
Skills & Interests
What happens to my resume after I submit it
Referrals
Formatting:
Without strong, consistent formatting, a resume is difficult to read. That can be catastrophic, especially since a resume is often the first thing someone looks at to learn more about you.
Great formatting is therefore extremely important. Here are some best practices:
A resume should be AT MOST one page. If it’s longer than one page long, it’ll often immediately be rejected. If yours is longer than one page as an undergrad, you’re almost certainly using too much fluff in your bullet points and including unnecessary details. Use half-inch margins to create more space
The font for section headers should be larger than for body text. Body text should be size 10, 11, or 12. Anything smaller and it’s too hard to read. Anything larger and you’re wasting too much space
All text should be black. When you insert links into your resume (for a LinkedIn profile or email, for example), it’ll often change that text color to blue and underline it. Make sure to change it back to black and take away the underline
Any abbreviations or stylistic choices need to be consistent throughout. For example, if you choose to bold the company and italicize the role, make sure that’s the same throughout the page. Similarly, month abbreviations need to be consistent throughout your resume — January 2023, Jan. 2023, and Jan 2023 all work, but make sure that you then abbreviate all months the same way. I abbreviate to the first three letters for each month, but as long as you’re consistent throughout, any formatting is fine
Try to minimize as much white space as possible on the page. For experience bullet points, try to write to the end of the line. Too many resumes waste space by using only a few words per bullet point. Notice that on mine, the bullet points go to the end of the page every time
The header section (name and contact information) should be center-aligned. All dates should be right-aligned. Everything else should be left-aligned
Make sure your name is in your resume’s file name. [First name]_[Last name]_Resume.pdf is always a good bet. For reference, mine is Dennis_Gavrilenko_Resume.pdf
Header:
The header is pretty self-explanatory — it identifies your resume to whoever is reading it. Here’s mine:

Your name should be bolded and in the largest font on your resume to quickly identify whose resume you’re reading. Make sure to include your phone number (recruiters sometimes call to let you know about an offer decision), an email you check often, your LinkedIn, and your personal website (if you have one).
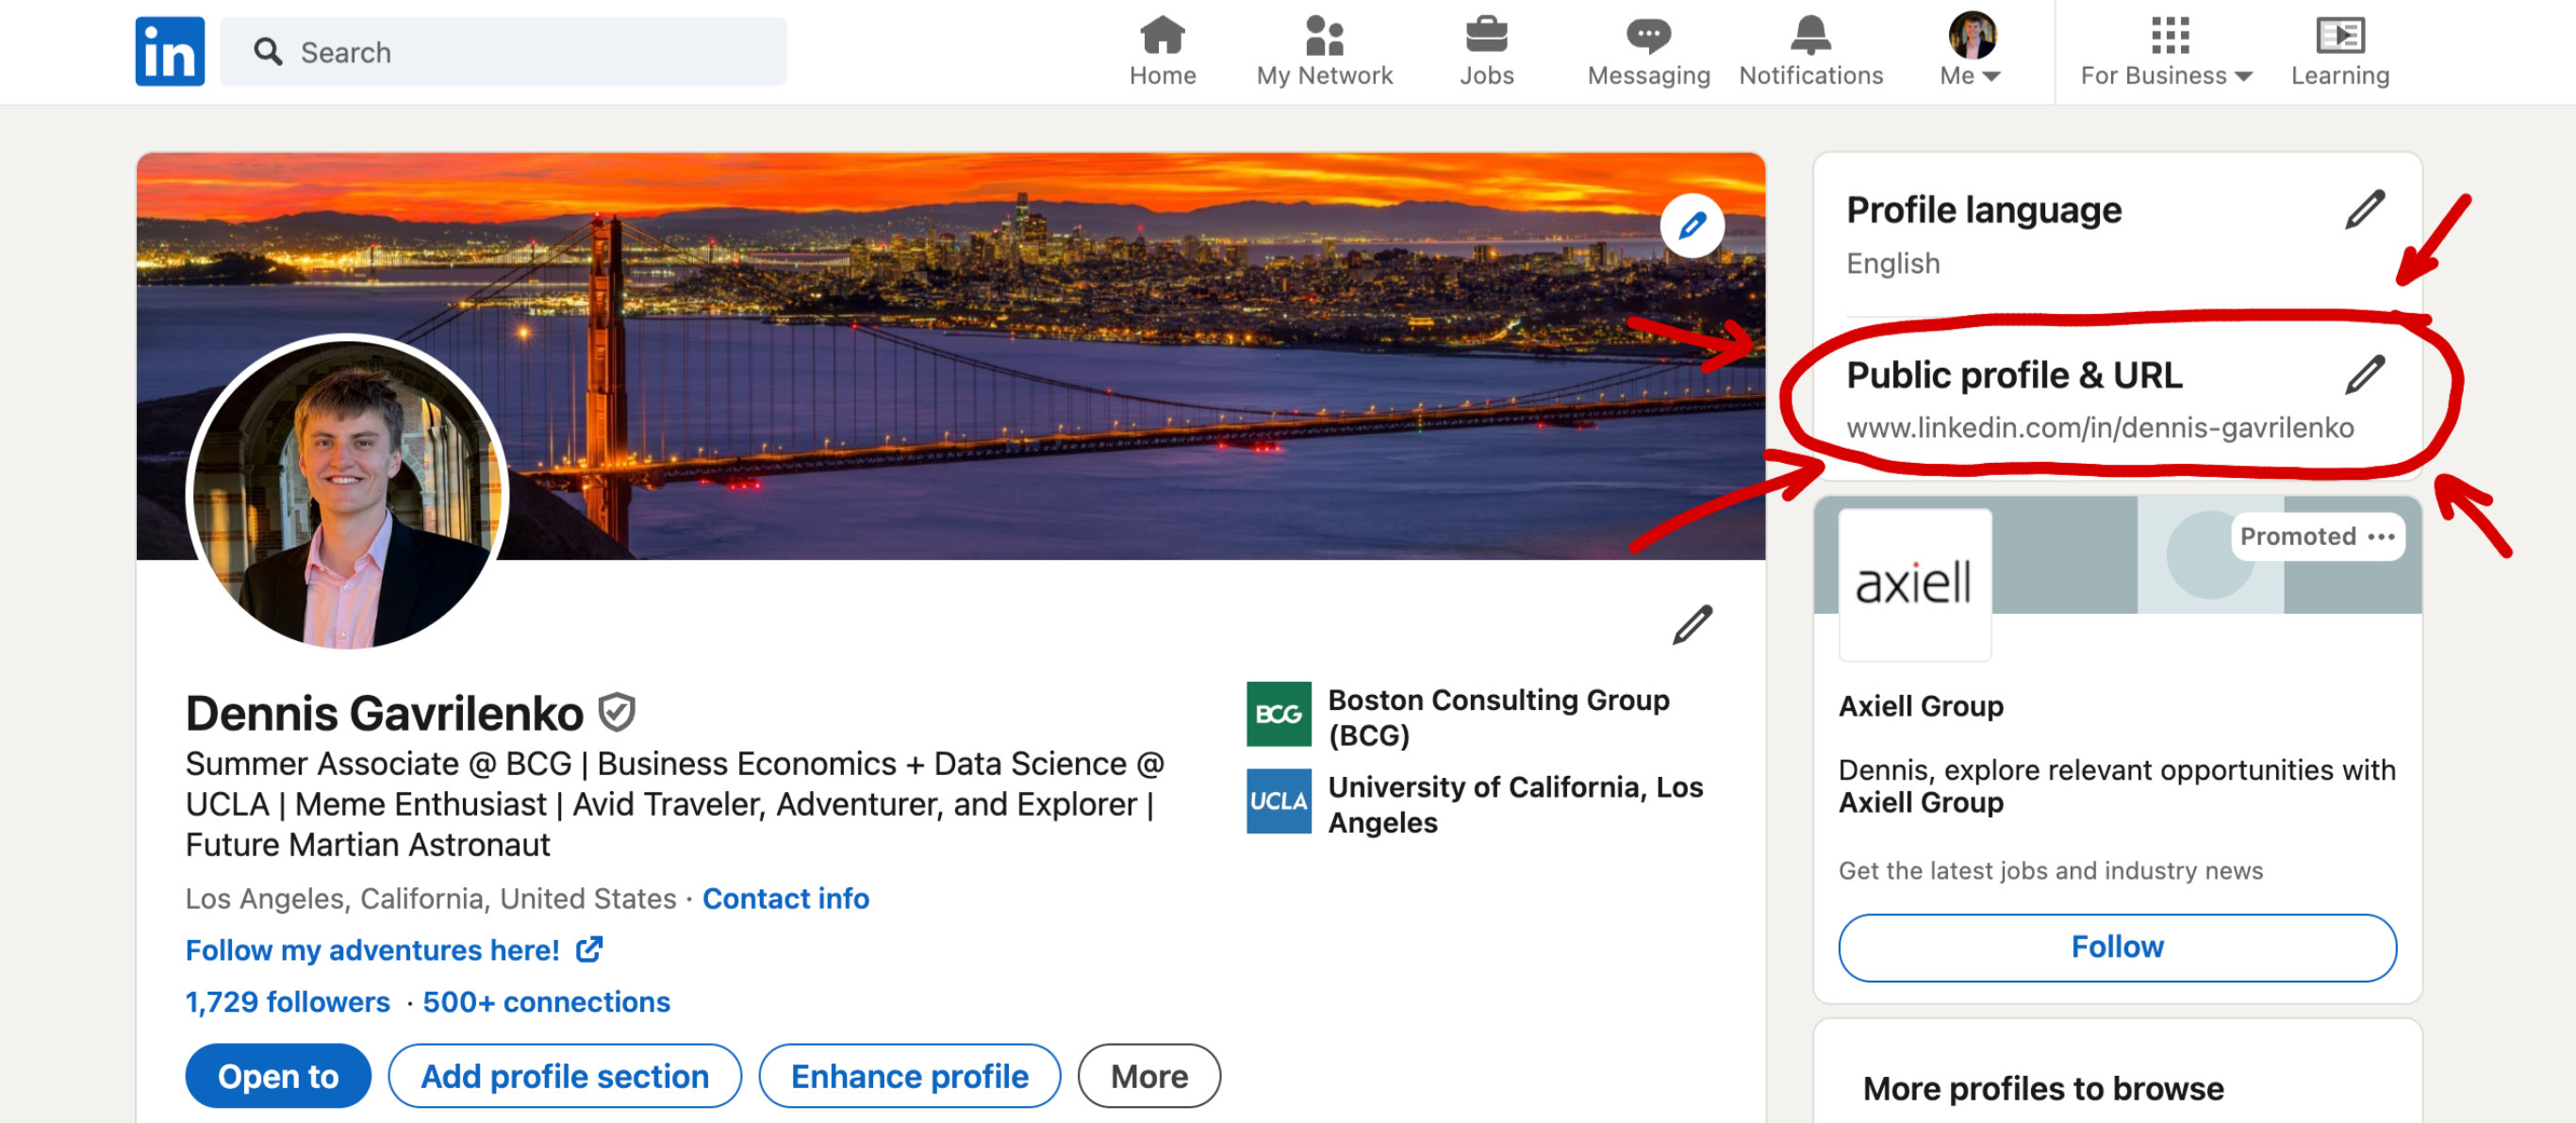
For your LinkedIn URL, its format will be always “linkedin.com/in/[your specific profile address]”. This specific profile address is editable, and I strongly encourage you to make sure to edit your to [first name]-[last name], like mine. To do so, go to your LinkedIn profile page, and at the top right, click the pencil in the “Public Profile & URL” section.
I’ve also seen some people include a location in the header in the [City], [State] format, but it’s optional and totally up to you to include that. If you’re based in a city outside of the US, I recommend going with [City], [Country] (e.g. Paris, France). Make sure that you do not use city abbreviations (write San Francisco or New York City, not SF or NYC), but that you do use state abbreviations (CA, not California).
Education:
The education section highlights where you studied, what your grades were, and what courses you took.
Ideally, it shows that you are a competent, successful student who has studied something that is relevant to the position you’re applying for. Here’s mine:

Make sure to include your university’s name, its location, and the year you graduated or expect to graduate. If you’re currently a student, use your predicted graduation date, as you see above.
Clearly state what degree you’re studying, your GPA (if it’s above a 3.5), and any relevant test scores (I recommend including your SAT score if it’s 1450 or above and your ACT score if it’s 33 or above).
Make sure to include any coursework that is relevant to the position you’re applying for. Don’t include the elective Roman Archaeology class you took on a resume for a marketing internship unless it’s an extremely niche position that markets 3D-printed Roman artifacts (and if that’s a thing, please reach out to me).
If you’re applying for more than one kind of position (i.e. you’re recruiting for both consulting and SWE), I recommend having 2 resumes, one for each kind of position (with each resume having different classes under the “Relevant Coursework” section). If this is you, make sure you title those resumes appropriately (Dennis_Gavrilenko_Resume_Consulting.pdf vs Dennis_Gavrilenko_Resume_SWE.pdf).
If you have more than one education, make sure to list them in order based on the end date, with the latest end date at the top (this is standard for all educations and professional experiences, as we’ll see later in the “Professional Experience” and “Leadership and Volunteer Experience” sections). In my case, I studied abroad for a semester and included the relevant courses I took there as well.
If you’re a first or second-year college student, it’s perfectly acceptable to include your high school education, activities, and grades on your resume. However, by your third year, you ideally have done enough in college to remove your high school from your resume completely.
Professional Experience:
The professional experience section is the main part of your resume.
It shows employers that you are a competent individual who can work on a team, get stuff done, and make an impact. In this section, you’ll describe all the previous work experience you’ve previously had.
I believe that you can learn something from any job, so include all experiences that you have that you could talk about during an interview. For example, I worked as a soccer referee for 7 seasons before starting college at UCLA; while that was a completely different industry than my first summer internship at First Republic Bank, I brought up refereeing during my interviews in the context of my leadership and communication skills that I learned while refereeing.
Here’s my Professional Experience section:
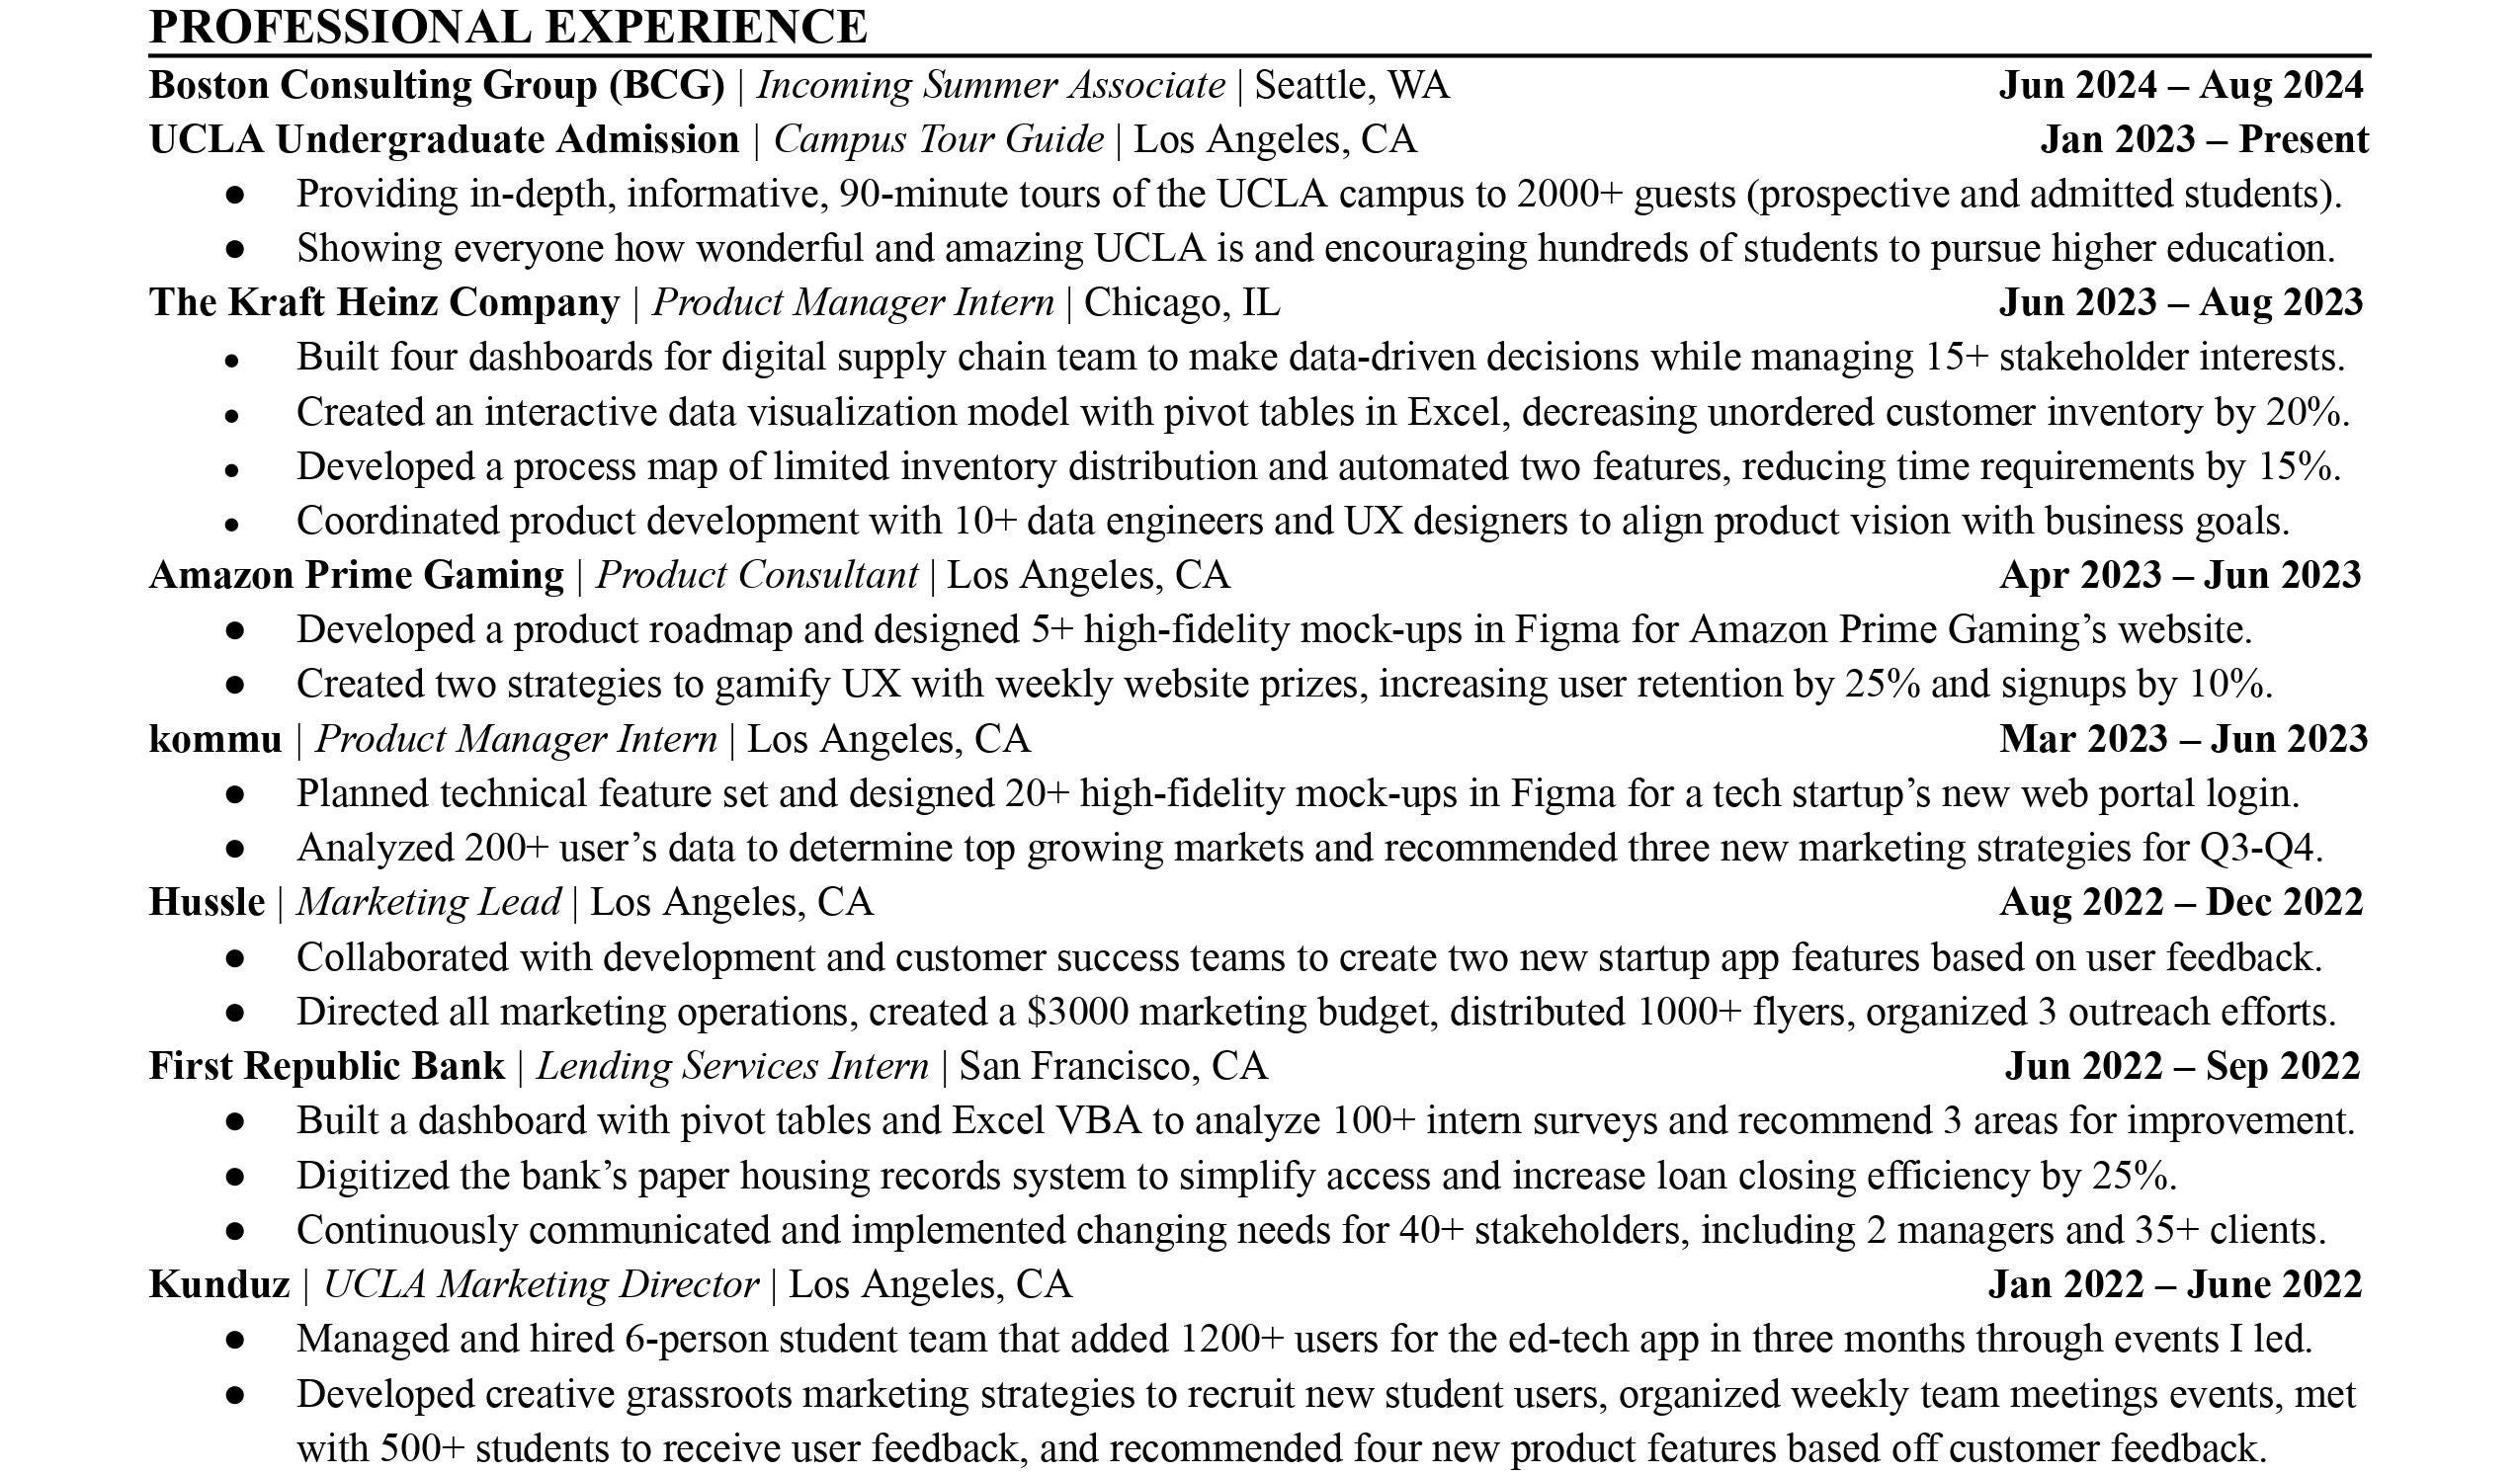
Here, you can see the consistent formatting of a header line with the company name, position title, location, and dates of employment, followed by bullet points describing what I did in that position. Same as in the “Education” section, the experiences should be ordered by the end date, with the most recent at the top.
If you have a future job lined up, you can add it to your resume with the same header line as any other job and no bullet points (with the word “Incoming” in the position title). See my resume above for an example of this, with “Incoming Summer Associate” as the job title.
The bullet points that describe your experiences are the single most important part of your resume; with poor bullets, it’s unlikely you’ll get an interview for any competitive job. Here are the best practices:
Focus on your impact and quantify this impact as much as possible
Focus on your impact and quantify this impact as much as possible
Focus on your impact and quantify this impact as much as possible
Oh, did I mention to focus on your impact and quantify this impact as much as possible?
When writing these bullet points, focus on what you did during your role; do not just repeat the job description (it’s very helpful to think about what impact you’re making while working in the position — that makes writing the resume much easier!).
If you read a resume bullet point and are left wondering afterward, “What did they actually do?”, that is a poorly written bullet point.
Here is an example of such a poorly-written bullet point:
Worked as a product manager intern, shadowing a team of PMs and building tools for others
Here is an example of the same bullet point, but written well:
Built four data dashboards for the digital supply chain team to help 15+ stakeholders make data-driven decisions
With the poorly-written bullet point, you’re left thinking, “Wtf did I just read”. With the well-written one, you know exactly what the person did in the role.
Here are some more tips regarding writing bullet points:
Include as many numbers as possible. This is the “quantify this impact as much as possible” part. Include percentages of growth or efficiency if possible. If you know it, include the number of people your work impacted. Revenue and user growth numbers are great here if you have them.
If possible, match the wording of your bullet points to the specific job listing you’re applying for.
Make sure that your bullet points go to the end of the page as much as possible. Resume space is very limited, so use that limited space to its fullest extent. Notice that in my resume, every single bullet point goes to the very right side of the page.
Lastly, make sure that you can talk about every single bullet point during an interview. Do not include something on your resume if you can’t elaborate on it further.
Leadership & Volunteer Experience:
This section is for experiences you have that aren’t necessarily jobs but have taught you skills that would be useful in a job. For college students, this section is usually for club involvements or volunteering. Here’s mine:

Notice that the formatting is exactly the same as in the “Professional Experience” section. The header is company/organization, position, location, and dates of involvement. The bullet points similarly focus on impact, quantify when possible, and go to the end of the page.
Skills & Interests:
This section is often overlooked but adds a ton to a resume and to a candidate profile when done well. Here, you include any relevant skills you may have, awards and achievements you’ve accomplished, languages you speak, and interests. Here’s mine:

Under the languages section, it is crucial that you only add languages you can actually speak. If a language is included on your resume, it’s fair game for any interviewer to assume that you are proficient in that language to the extent you say on the resume. If you say you’re fluent in Spanish on your resume and can’t hold a conversation with your Argentinian interviewer, you are almost certainly guaranteed to not get that job. The number of times I have seen something like this happen is way too many to count. Don’t lie on your resume!
I once interviewed someone for my consulting club who had “Russian (Intermediate)” on their resume, but when I tried talking to them in Russian, they couldn’t say a single sentence. Not a good look.
“Interests” is the most underrated line on the entire resume. It’s usually not included, but it is extremely important because it gives you something to bond over with your interviewer. When interviewing, the goal is to build a connection with the interviewer as quickly as possible (to make the interview more conversational and pleasant for both parties), and having a variety of interests on your resume helps tremendously. During my summer internship at BCG, I met my final-round interviewer 8 months after he interviewed me, and he said, “Wait, you were the one who grows the peppers!”
Final Formatting Check:
Hooray! You’re all done with creating your resume.
For the check, download your resume into a PDF and upload it to the Vmock resume screener. It’ll make sure that your spelling and punctuation are all correct, the spacing and formatting are perfect, and everything is where it should be.
This Vmock service is free for UCLA students (yay!) and likely is for your university, too. You can use it to build the resume as well, but I’ve found that students who write their resumes from scratch end up having higher quality ones since they properly take the time to think about each bullet point and section they’re adding.
What happens to my resume after I submit it:
Congrats, you’ve made it to the end of the resume-making section! Now that you’ve made yourself a great resume, it’s important to know what happens after you submit it for a job posting. Where does it go? Who sees it? What happens next?
Usually, after a resume is submitted, it goes through a resume screener (an “Applicant Tracking System”, or ATS, for short), which is a software that checks your resume for keywords and relevant experiences, ranks your resume among all the other ones submitted, and then recommends certain resumes for a recruiter to look at afterward. An ATS is the first layer of screening a candidate goes through.
This means that if you don’t have a good resume, it may never even reach a pair of human eyes. Proper formatting and strong bullet-point writing are extremely important and help make sure that your resume gets through the ATS. If you apply for a position and get rejected before an interview, it’s likely that the ATS determined your resume wasn’t good enough.
Referrals:
A referral is where someone currently working at the company you’re applying for puts in a good word for you. This can be done in several ways, including but not limited to applying through a custom job listing link, inputting your referrer’s name somewhere on your application, or having your referrer fill out a form for HR.
A referral usually improves your resume ranking, making it more likely it gets into the hands of a recruiter and you to a first-round interview.
You can think of it like this: when you apply for a job, your resume is put into a pile of all the other resumes submitted for that job. If you get a referral, it puts your resume on the top of that pile.
I encourage you to learn more about ATS here.
And so we made it! Congrats to you for reading to the end, and best of luck in creating a wonderful resume. If you have any further questions, requests for future articles, or general feedback on my writing, please email me at contact@interosity.co.
Best,
Dennis